AMS unit installation
 Overview
Wall mounting
Proceed as follows to mount the 1643AMS unit on a flat, vertical surface:
1 |
Fix both wall mounting brackets (items 1 and 2) to the bottom of the 1643 AMS unit with four M3x8 screws (see Figure 3-16, Fixing wall mounting brackets (AMS unit)). |
2 |
After deciding where the unit is to be mounted, hold it against the wall, align it vertically or horizontally, and mark the four drill holes. Recommendations:
|
3 |
Mount the 1643 AMS unit to the wall with four M3x8 screws. End of steps |
Results
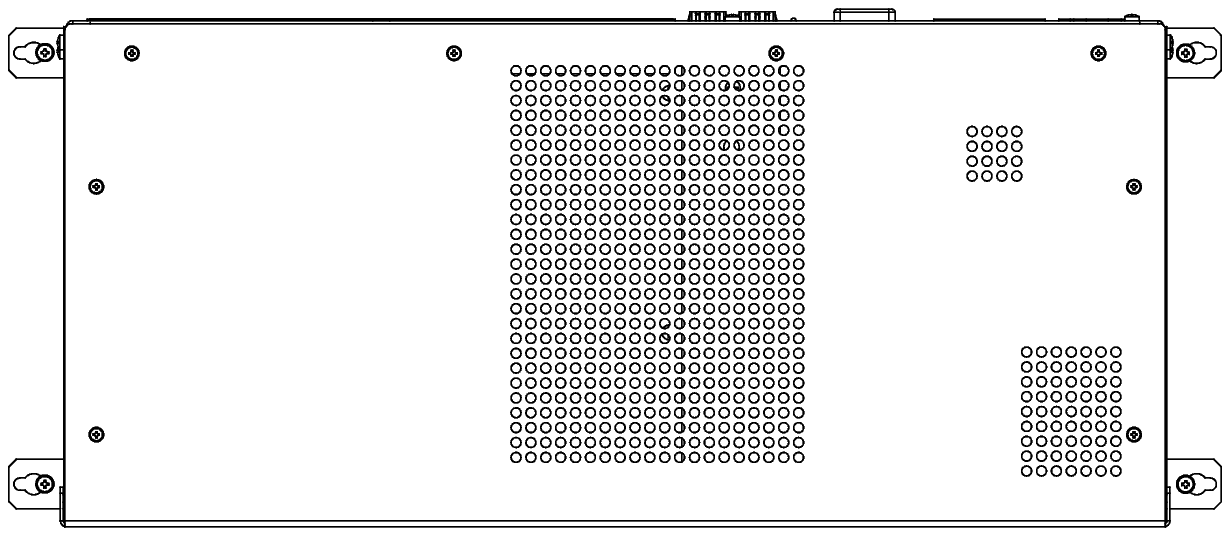
Figure 3-16: Fixing wall mounting brackets (AMS unit)

Figure 3-17: Horizontal wall mounting (AMS unit)
Horizontal rack mounting
Important! There are important mounting rules which must be observed during the installation process (see Appendix A, Mounting rules).
Proceed as follows to mount the 1643 AMS unit into a rack horizontally:
1 |
Fix the additional brackets with two screws as shown in Figure 3-18, Fixing additional brackets to the AMS unit (if required). Important! This step is not necessary if the 1643 AMS unit will be mounted into a 19-inch rack! |
2 |
Fix both brackets (left and right) with six M3x8 screws (three at each side) to the 1643 AMS unit as shown in the figures below. NOTE: The mounting positions depend on the used rack type! |
3 |
Mount the 1643 AMS unit to the rack with four hexagon bolts M6x16. End of steps |
Results
Figure 3-18: Fixing additional brackets to the AMS unit (if required)
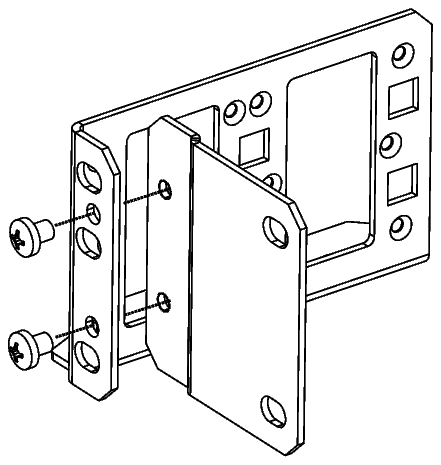
Figure 3-19: Mounting position for MADM compact racks, Wavestar ADM 16/1 racks and DACS racks
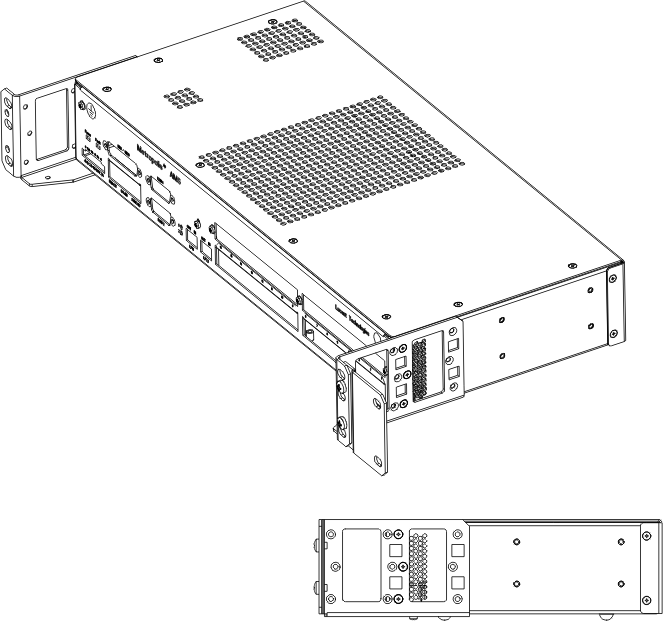
Figure 3-20: Mounting position for MADM universal racks and ETSI racks (depth 300 mm)
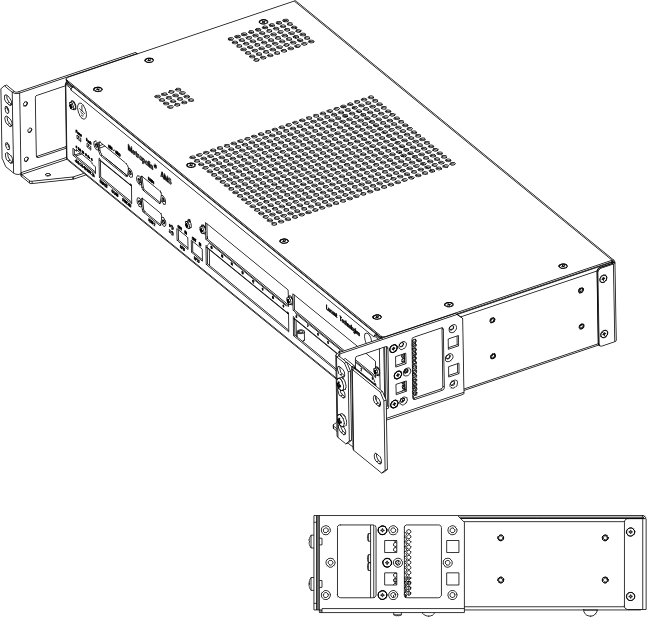
Figure 3-21: Mounting position for ADM 16/1 racks and ETSI racks (600 mm x 600 mm)
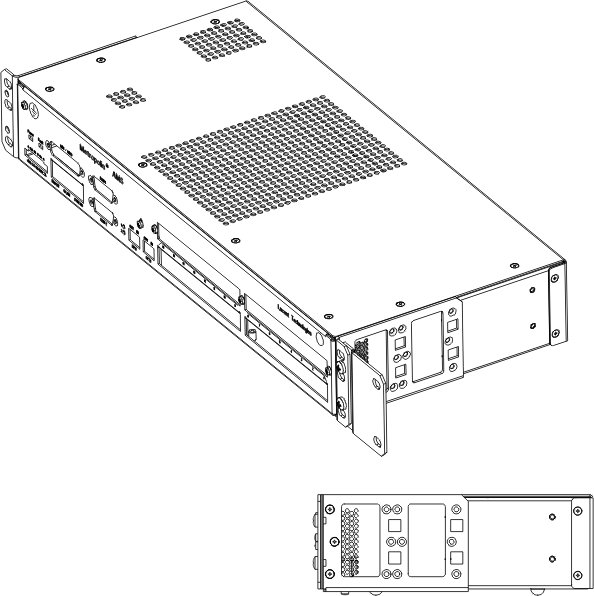
Figure 3-22: Mounting position for 19-inch racks
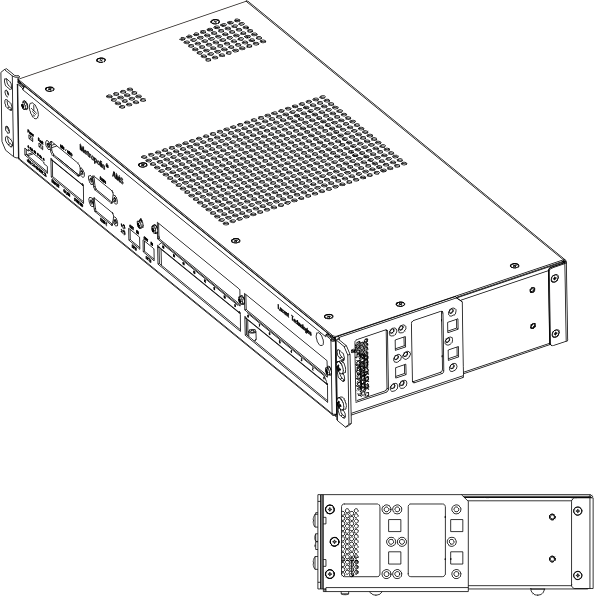
Figure 3-23: Mounting position for ETSI-2 (LambdaUnite) racks (back-to-back, depth 600 mm)
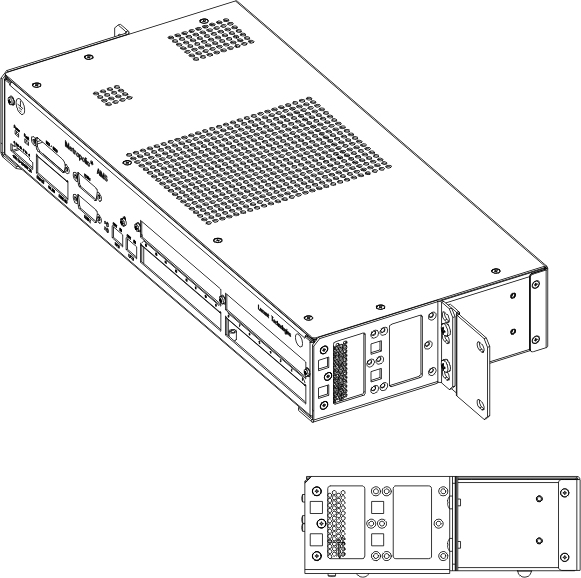
Street cabinet mounting (with fan unit)
The 1643 AMS unit can be mounted in an outdoor street cabinet in conjunction with an AnyMedia Access System. In that case a fan unit containing two fans must be mounted to the side of the 1643 AMS unit. Proceed as follows to mount the 1643 AMS unit into a street cabinet:
1 |
Unscrew the seven M3x3 screws which are pre-screwed on the right side of the 1643 AMS unit. |
2 |
Place the fan unit with its slotted holes over the screw heads. Important! Pay attention to the correct orientation (see Figure 3-24, Fixing fan unit and brackets (AMS unit)). The alarm and LED interface must be located closer to the 1643 AMS unit than the power interface. |
3 |
Shift the fan unit until it cannot be moved any longer. |
4 |
Fix the screws through the fan unit holes. |
5 |
Fix the left bracket to the 1643 AMS unit with five M3x8 screws and washers (3 x side, 2 x bottom) and the right bracket to the mounted fan unit with 4 M3x8 screws and washers (2 x side, 2 x bottom) as shown in Figure 3-24, Fixing fan unit and brackets (AMS unit). |
6 |
Mount the 1643 AMS unit to the rack with four hexagon bolts M6x16. NOTE: The connectors of both units (fan and unit) must show to the front. End of steps |
Results
Figure 3-24: Fixing fan unit and brackets (AMS unit)
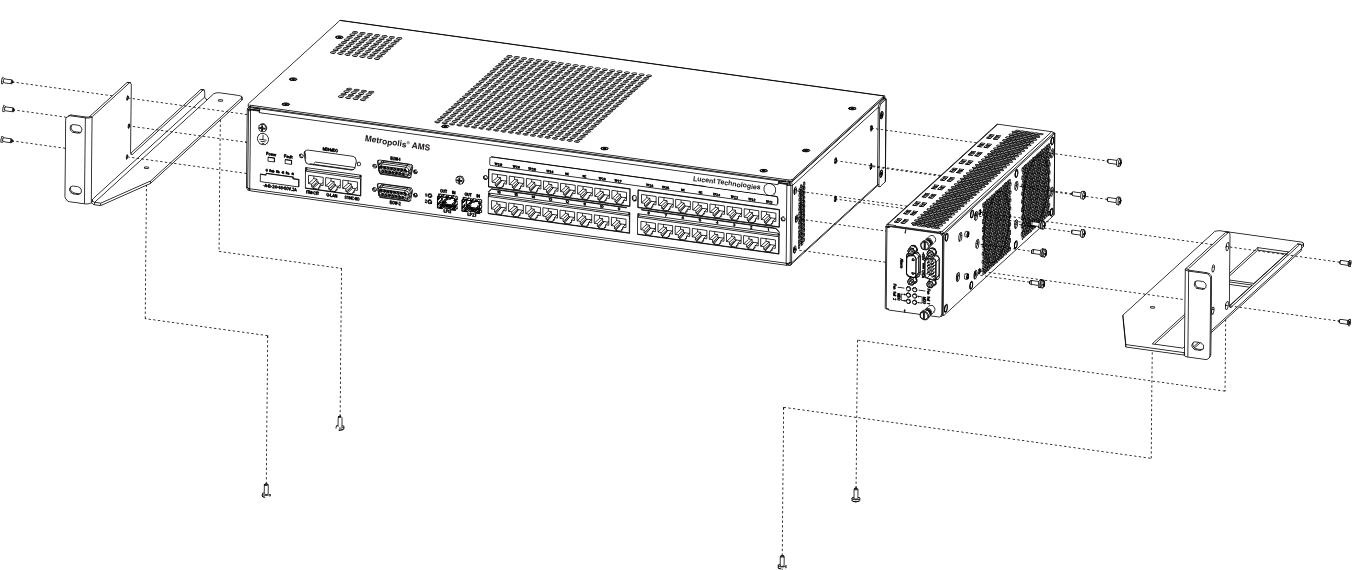
Figure 3-25: Street cabinet mounting (AMS unit)
