Sample STM network SLA monitoring configuration
Continual network topology monitoring
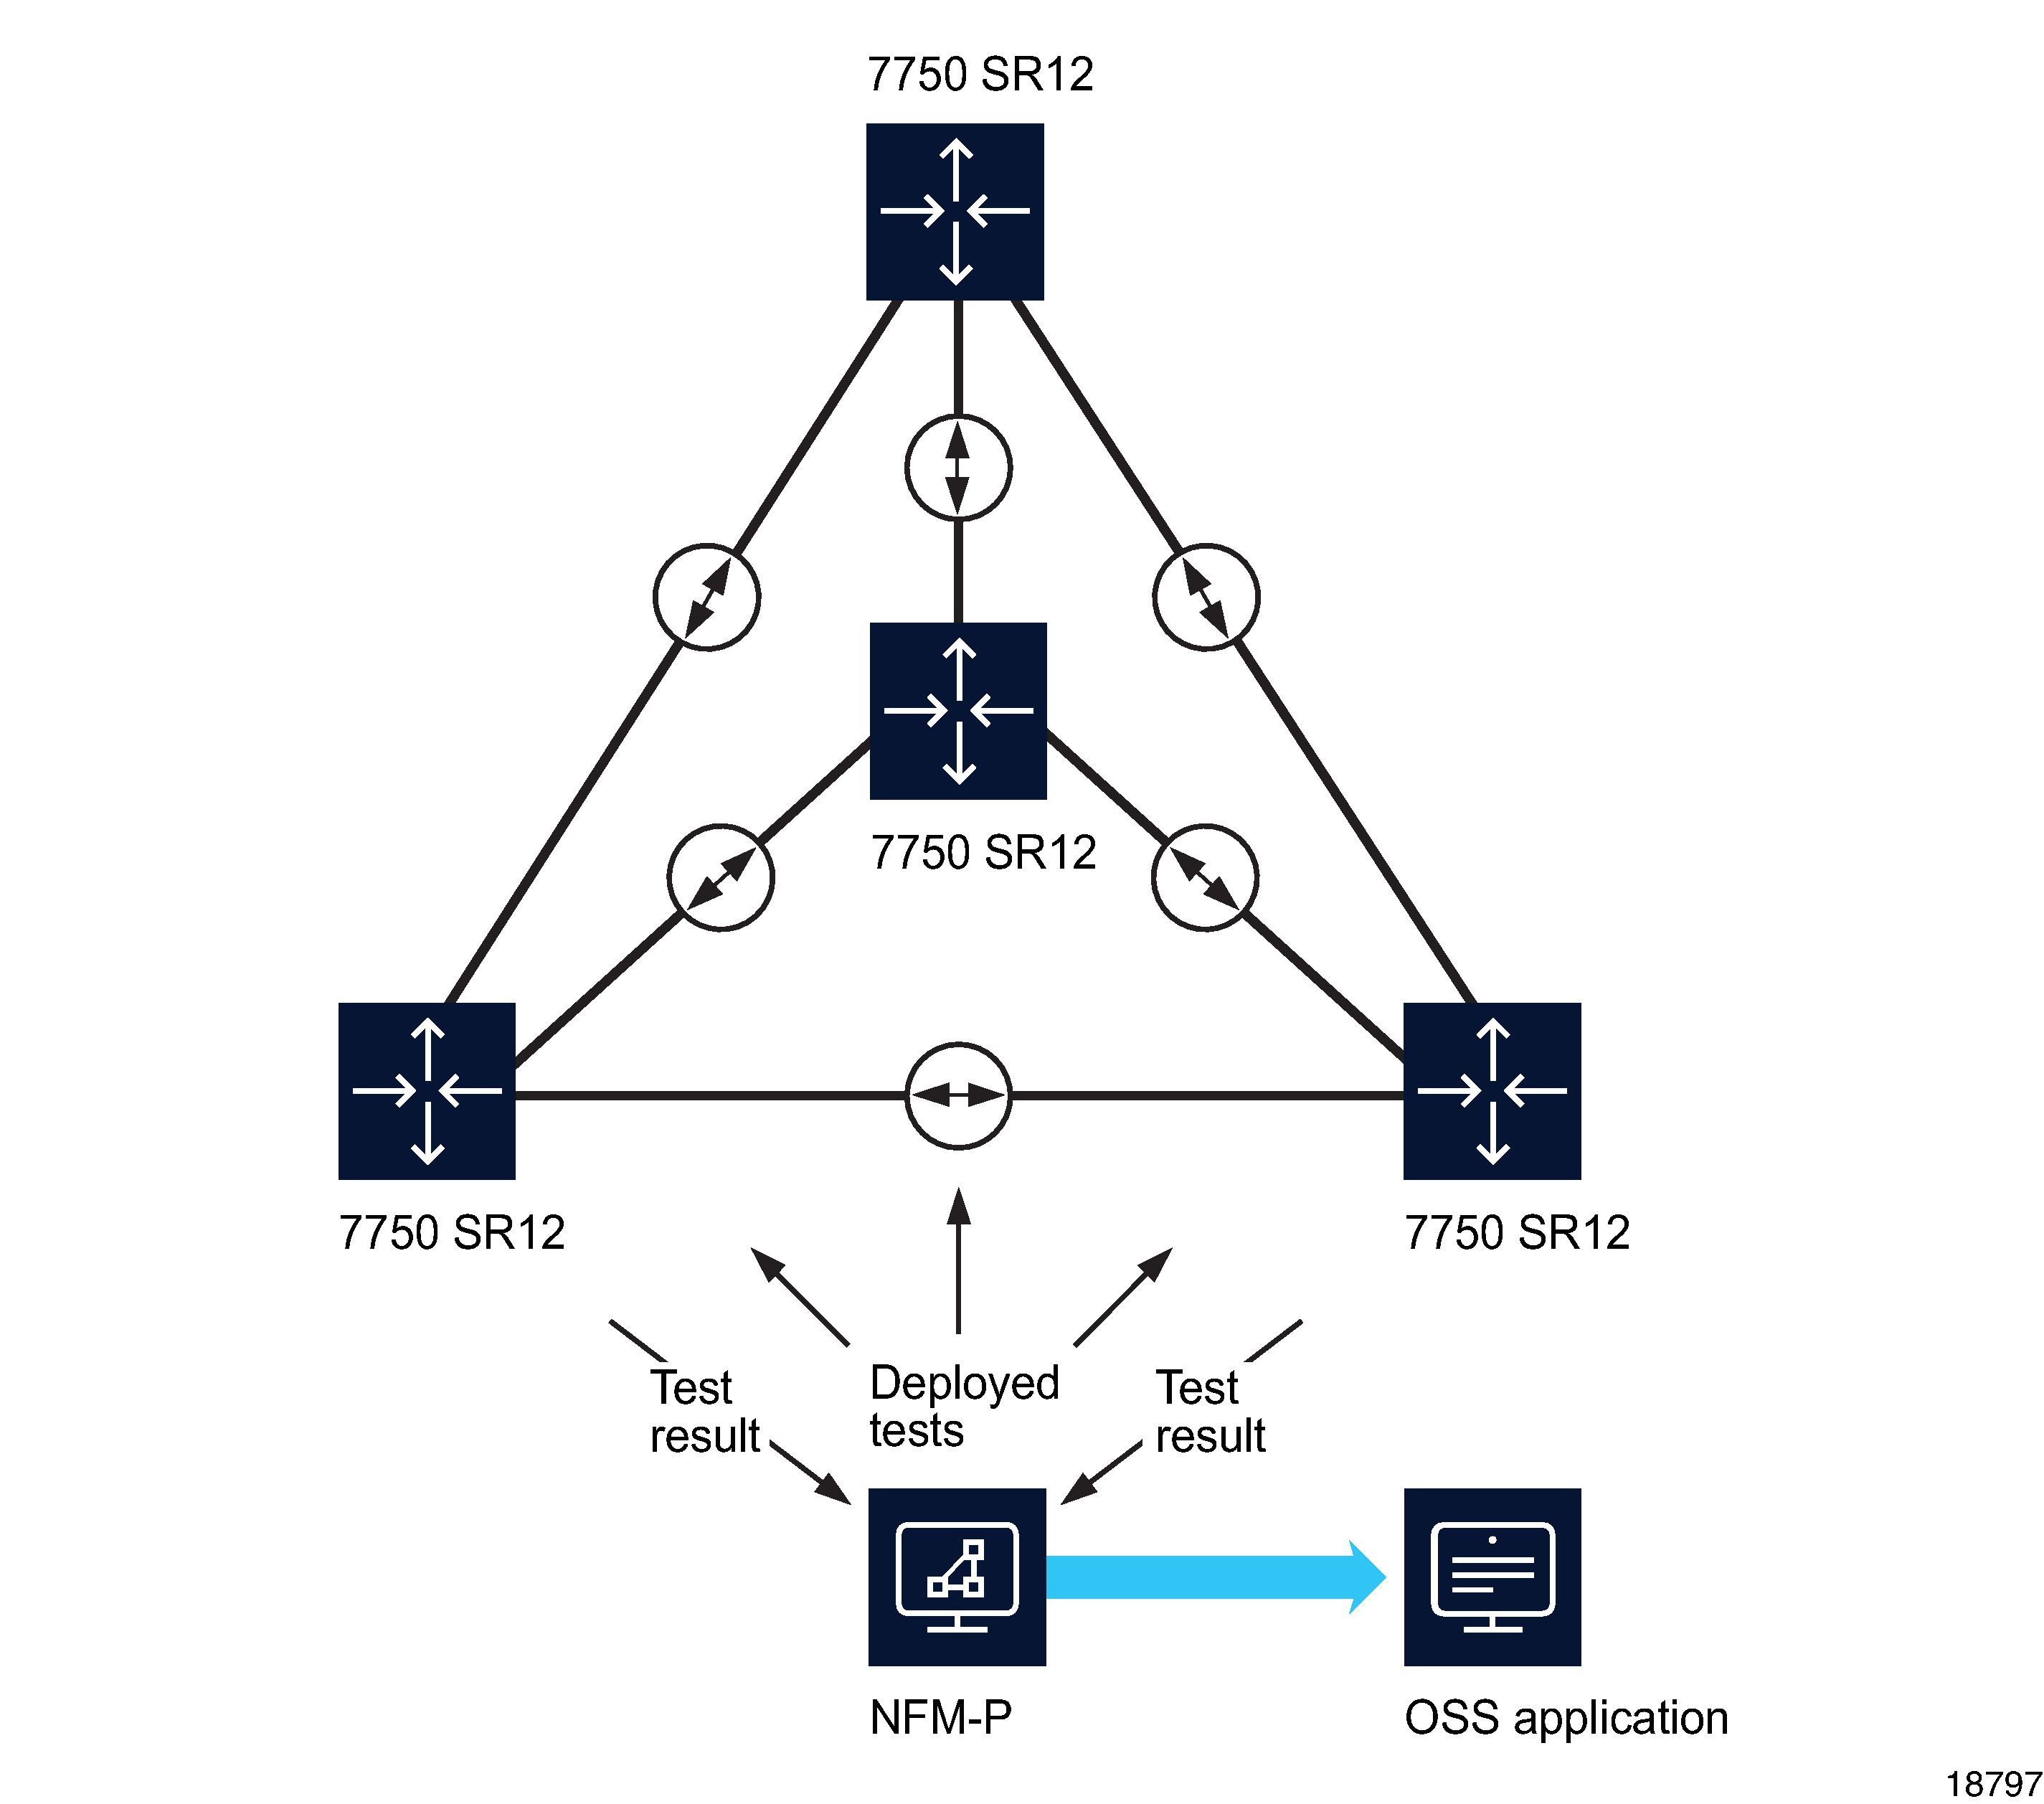
The following figure shows the high-level flow of tests and test results in a simple network topology that the network provider wants to continually monitor using the STM. See the sample network monitoring configuration steps that follow for the steps required to create the STM configuration.
Figure 89-2: Continual network topology monitoring

An NFM-P administrator creates and schedules an STM test suite to monitor the LSP mesh and identify potential overloading and reachability problems before they affect service traffic. The test suite contains ping and trace test definitions for three different classes of in-profile traffic and is scheduled to run every 15 min.
Note: This sample configuration uses an NFM-P schedule to create a scheduled task. See Chapter 5, NFM-P-based schedules for information about NFM-P schedules.
Because the same group of tests is to be run on multiple entities of the same type, the test suite consists of generated tests only.
The test policy that the NFM-P uses to generate the tests contains the following six test definitions:
The NFM-P generates 72 tests for the test suite—3 ping tests and 3 trace tests for each of the 12 LSPs and LSP paths. Every 15 min., the NFM-P scheduler executes the tests and stores the results. An OSS application periodically retrieves the test results, performs trend analysis, and provides the transport utilization information to NOC monitoring staff.
The NFM-P generates an alarm in the event of an LSP ping probe failure or an LSP trace path change, as specified in the test policy, so NFM-P operators become aware of new transport faults as they arise.
Sample network monitoring configuration steps
The following steps describe the configuration of the network monitoring sample shown in Figure 89-1, Sample STM implementation. For clarity, only the configuration steps required for the sample are described. See the procedures in Procedures to use the STM for complete STM configuration information.
Stages
Create a test policy | |||||||||||||||||||||||||||||||||||||
1 |
Choose Tools→Service Test Manager (STM) from the NFM-P main menu. The Service Test Manager (STM) form opens. | ||||||||||||||||||||||||||||||||||||
2 |
Click Create and choose Test Policy. The Test Policy (Create) form opens. | ||||||||||||||||||||||||||||||||||||
3 |
Configure the parameters in Table 89-2, Test policy General tab parameters, using the supplied values. Table 89-2: Test policy General tab parameters
| ||||||||||||||||||||||||||||||||||||
4 |
Click on the Test Definitions tab. | ||||||||||||||||||||||||||||||||||||
5 |
To add LSP Ping test definitions to the test policy, click Add and choose MPLS→Add LSP Ping. The LSP Ping Definition (Create) form opens. In the sample configuration, the operator creates a separate LSP Ping test definition for each of the following forwarding classes: | ||||||||||||||||||||||||||||||||||||
6 |
Configure the parameters for each test definition using the values supplied in Table 89-3, LSP Ping Definition parameters. Table 89-3: LSP Ping Definition parameters
| ||||||||||||||||||||||||||||||||||||
7 |
For each LSP Ping test Definition you create, click OK to save the changes and close the form. The Test Policy (Create) form is displayed, with the LSP Ping test definitions listed. | ||||||||||||||||||||||||||||||||||||
8 |
To add LSP Trace test definitions to the test policy, click Add and choose MPLS→Add LSP Trace. The LSP Trace Definition (Create) form opens. In the sample configuration, the operator creates a separate LSP Trace test definition for each of the following forwarding classes: | ||||||||||||||||||||||||||||||||||||
9 |
Configure the parameters for each test definition using the values supplied in Table 89-4, LSP Trace Definition parameters. Table 89-4: LSP Trace Definition parameters
| ||||||||||||||||||||||||||||||||||||
10 |
For each LSP Trace test Definition you create, click OK to save the changes and close the form. The Test Policy (Create) form is displayed, with the LSP Trace test definitions listed. | ||||||||||||||||||||||||||||||||||||
11 |
Click OK to save your changes and close the Test Policy (Create) form. The Service Test Manager (STM) form is displayed. | ||||||||||||||||||||||||||||||||||||
Create a schedule | |||||||||||||||||||||||||||||||||||||
12 |
Choose Tools→Schedules→Schedule from the NFM-P main menu. The Schedule form opens. | ||||||||||||||||||||||||||||||||||||
13 |
Click Create. The NFM-P Schedule (Create) form opens. | ||||||||||||||||||||||||||||||||||||
14 |
Configure the parameters in Table 89-5, NFM-P Schedule parameters using the supplied values. Table 89-5: NFM-P Schedule parameters
| ||||||||||||||||||||||||||||||||||||
15 |
Save your changes and close the form. | ||||||||||||||||||||||||||||||||||||
16 |
Close the Schedule form. | ||||||||||||||||||||||||||||||||||||
Create an STM test suite | |||||||||||||||||||||||||||||||||||||
17 |
Click Create on the Service Test Manager form and choose Test Suite. The Test Suite (Create) form opens. | ||||||||||||||||||||||||||||||||||||
18 |
Configure the parameters in Table 89-6, Test suite parametersusing the supplied values. Table 89-6: Test suite parameters
| ||||||||||||||||||||||||||||||||||||
19 | Choose a test policy to govern the generation of tests.
| ||||||||||||||||||||||||||||||||||||
20 | Choose the LSPs for the test suite to assess. | ||||||||||||||||||||||||||||||||||||
21 |
Click Apply to save the changes. Additional buttons appear and the form name changes to Test Suite (Edit). | ||||||||||||||||||||||||||||||||||||
22 |
Click on the Generated Tests tab. | ||||||||||||||||||||||||||||||||||||
23 |
Click Generate Tests. The NFM-P generates a test for each LSP listed on the Tested Entities tab. The tests are listed on the form as they are generated. | ||||||||||||||||||||||||||||||||||||
24 | Apply a span of control to the test suite. | ||||||||||||||||||||||||||||||||||||
Create a scheduled task | |||||||||||||||||||||||||||||||||||||
25 |
Click Schedule at the bottom of the Test Suite form. The STM Scheduled Task (Create) form opens. LSP Test Suite is displayed in the Task panel. | ||||||||||||||||||||||||||||||||||||
26 |
Configure the parameters in Table 89-7, NFM-P scheduled task parameters using the supplied values. Table 89-7: NFM-P scheduled task parameters
| ||||||||||||||||||||||||||||||||||||
27 |
In the Schedule panel, click Select and choose the LSP Assurance schedule you configured in Stage 14. | ||||||||||||||||||||||||||||||||||||
28 |
Save your changes and close the forms. | ||||||||||||||||||||||||||||||||||||