Configuring the CBIS extension
The Fabric Services System ML2 Plugin creates a deployment within the Connect Service using the name of the CBIS Cloud deployment, as provisioned at installation time. Take care that no deployment exists with that name prior to the CBIS deployment. Also, during CBIS installation, this deployment IS automatically "enabled" within the Connect service by the CBIS installer; that is, it is set administratively "up".
-
Untar the integration tarball and put the extracted content under
/root/cbis-extensions inside the CBIS Manager VM.
This creates the /root/cbis-extensions/fss_connect folder, I.
-
Refresh the CBIS Manager UI.
The CBIS Manager detects /root/cbis-extensions/fss_connect as an SDN extension.
-
Add the extension configuration on CBIS manager UI.
Choose a unique name for each cloud. If there is another cloud name registered to the same Fabric Services System environment, the CBIS deployment fails before undercloud deployment. An error message indicates that a deployment exists with the same name.
-
Enter the following Fabric Services System environment details:
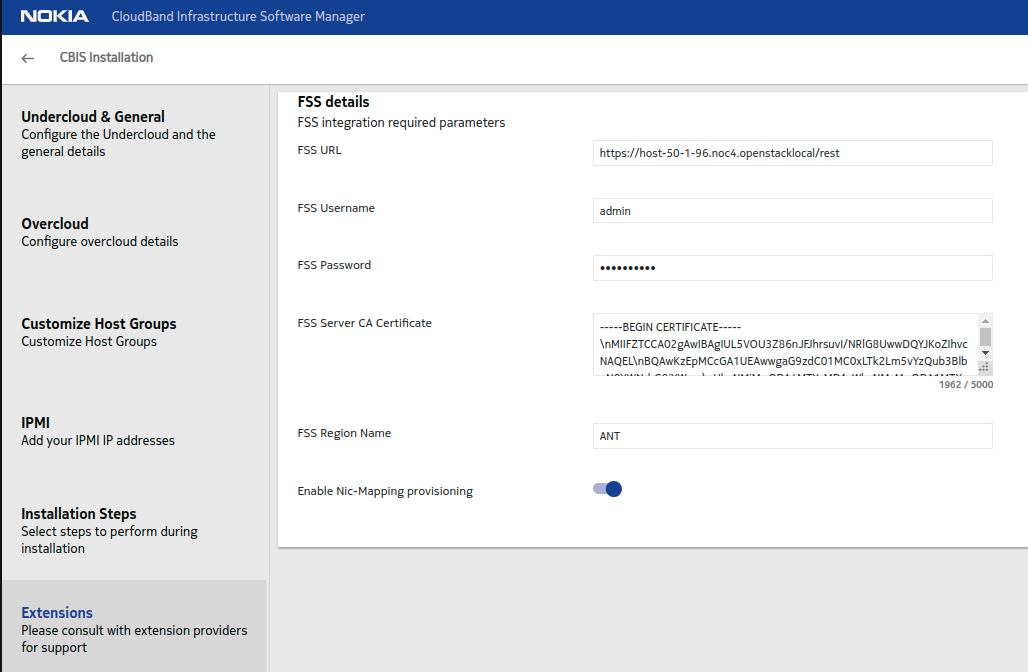
- FSS URL: use the format https://FQDN/rest, for example: https://host-40-1-2.noc3.openstacklocal/rest
- FSS Username: the default value is admin
- FSS Password
- FSS Server CA CertificateNote: For this value,
- Obtain the server.crt.pem for the API service from the
Fabric Services System environment.Note: You can use the following command to obtain this data:
.awk 'NF {sub(/\r/, ""); printf "%s\\n",$0;}' server.crt.pem - Convert the result into a single string with \n as newline.
- Copy this string into the text box.
- Obtain the server.crt.pem for the API service from the
Fabric Services System environment.
- FSS Region Name: The region name should match the region on the Fabric Services System, otherwise, deployment will fail with error that a region with that name cannot be found.