Data menu
Purpose
The data menu allows the operator to set the service for Data traffic. The menu options are:
-
MAC Flooding Threshold - To set the number of MAC Address per port
-
ASAP list - To show and manage the Alarm Severity Assignment Profile
-
OAM Management - Operation administration and maintenance management
-
PM Threshold - To configure the threshold parameters for Performance Monitoring.
-
E-LAN Service Management - To following options are provided to manage Ethernet LAN service:
-
Traffic Control - To manage traffic control
-
CES Management - To manage traffic control
-
EVC Loopback Management - Supports to inhibit traffic forwarding among group of ports.
Traffic descriptor
Select Data -> Traffic Descriptor as shown in the Figure 2-15, Data - Traffic descriptor.
Figure 2-15: Data - Traffic descriptor

To remove the existing traffic descriptor from the list, click Delete hyperlink.
To configure a new traffic descriptor, click Create to configure a data traffic descriptor tab.
ASAP list
Select Data -> ASAP List option as shown in Figure 2-16, ASAP list.
Figure 2-16: ASAP list

The ASAP list page contains a list of real User Label that can be displayed clicking on the relevant hyperlink:
Select Cancel to go back to the previous window.
The Create link allows to configure a new user label for a new ASAP profile.
MAC Flooding Threshold
Provides the option of setting the number of MAC address per port as shown in Figure 2-17, MAC Flooding Threshold.
Figure 2-17: MAC Flooding Threshold

Queue Management
Allows management of the queue.

OAM management
The option is used by the operations, administration, and maintenance personnel. It consists of the following sub-menu options:
Global setting
Global Setting contains the following information as shown in Figure 2-18, Global setting.
Figure 2-18: Global setting

The NE Global Setting tab displays the OAM Global Configuration panel that contains the following parameters:
Click Save to save all the settings.
OAM resource configuration
The OAM Resource Configuration menu contains the following sub-menu options:
MD
The Maintenance Domain menu option contains the following as shown in Figure 2-19, OAM resource configuration - MD.
Figure 2-19: OAM resource configuration - MD

The Maintenance Domain tab displays the following parameters:
Select Delete, and Create links to create, or delete the parameter values.
Maintenance association
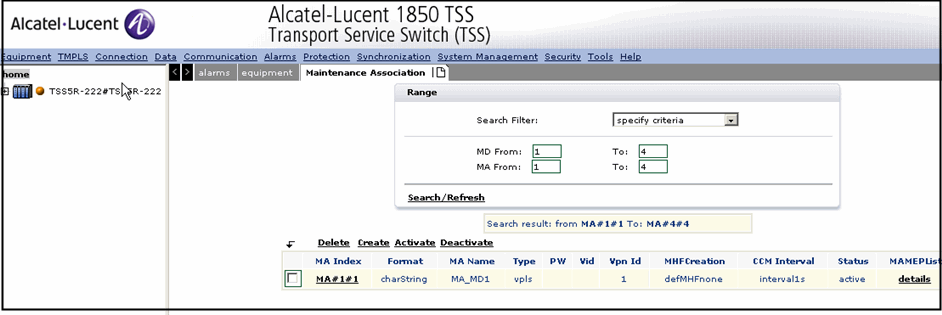
The Maintenance Association contains the following as shown in Figure 2-20, OAM resource configuration - Maintenance association.
Figure 2-20: OAM resource configuration - Maintenance association

The Maintenance Association tab displays the Range panel that consists the following parameters:
Select Search to perform the search. refer to procedure.
Select Create to create a new Maintenance Association.
Maintenance association MEP list
The Maintenance Association MEP List contains the following as shown in Figure 2-21, Maintenance association MEP list.
Figure 2-21: Maintenance association MEP list

The MA MEP List tab displays the Range panel that contains the following parameters:
Note: See Maintenance Association for parameter details.
MEP
The MEP contains the following as shown in Figure 2-22, MEP.
Figure 2-22: MEP

The MEP tab displays the Range panel that contains the following parameters:
Select Search to start the search, refer to Search MEP procedure
Select Create to create a new MEP, refer to Create MEP procedure.
MIP
When MA is created, MIP is created automatically.

The MIP tab displays the Range panel that contains the following parameters:
Table 2-2: Range panel parameters
|
Parameter |
Description |
|---|---|
|
Port identifier |
Specifies the port identifier. |
|
MD Level |
A small integer in a field in an OAMPDU that is used, along with the VID in the VLAN tag, to identify to which Maintenance Domain among those associated with the OAMPDU frame’s VID, and thus to which MA, a OAMPDU belongs to. |
|
Direction |
The MEP should have a field to indicate the direction of the MIP.The values are up and down. |
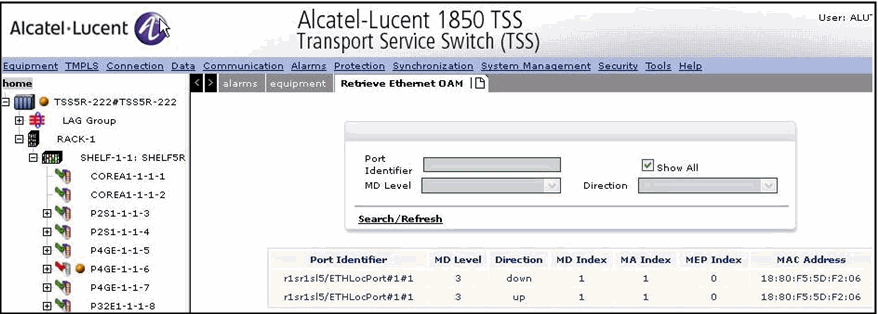
Click on search to retrieve a list of MIP's.
Figure 2-23: MIP

EFM tool
Select Data -> EFM tool option from the menu bar.
The EFM tool tab displays the Search Local Port panel.
Figure 2-24: EFM Tool

Click Search link to search for the available ports.
The boards panel is displayed.
Click boards display on the left pane that displays the local ports available on the right pane.
Click on any of the available port link to select a port name displayed in the Search Local Port panel.
Click Show to view the EFM tool panel with Configuration, Link Monitoring and Event Log tabs.
E-LAN service management
Select Data -> E-LAN Service Mgnt option as shown in Figure 2-25, ELAN service.
Figure 2-25: ELAN service

The E-LAN Service tab displays a table existing E-LAN service entries.
The Create link is used to configure a new E-LAN service.
Static Filtering DB
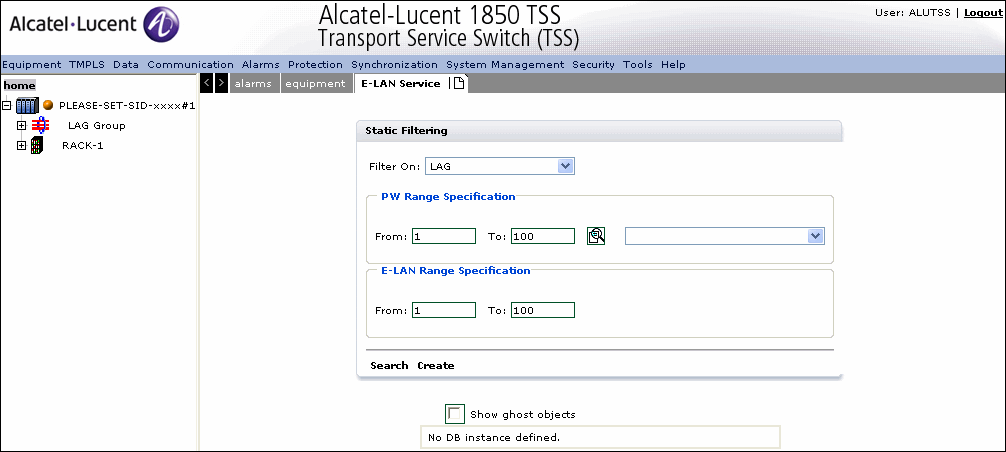
Select Data -> E-LAN Service Mgnt -> DB Filtering ->Static Filtering DBoption as shown in Figure 2-26, Static filtering DB.
Figure 2-26: Static filtering DB

The E-LAN Serivce tab displays the Static Filtering panel that contains the following:
-
Filter On - Allows to select the module for purpose of static filtering
-
E-LAN Range Specification - Specifies the E-LAN range. The valid range is 1 to 100
The Search allows to execute the filter on the criteria provided
The Create allows the user to configure another static filtering DB
Traffic control
Select Data -> Traffic control->Storm Control Profile as shown in Figure 2-27, Storm control profile.
Figure 2-27: Storm control profile

The Create allows the user to configure another static filtering DB
Traffic filtering profile
Select Data -> Traffic control->Packet Filtering Profile as shown in Figure 2-28, Packet filtering profile.
Figure 2-28: Packet filtering profile

Create allows the user to configure another static filtering DB
PDH port management
Select Data -> CES Management->PDH Port Management as shown in Figure 2-29, PDH port management.
Figure 2-29: PDH port management

Refresh refreshes the screen.
Generic TDM Parameters
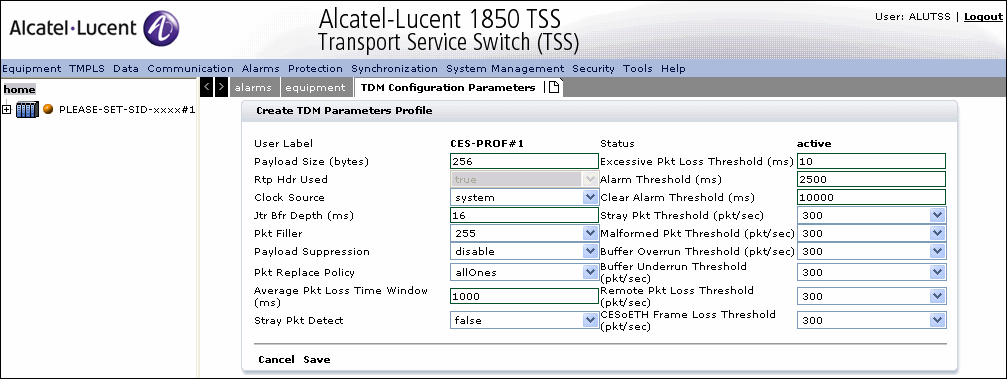
Select Data -> CES Management->Generic TDM Parameters as shown in Figure 2-30, TDM Parameters.
Figure 2-30: TDM Parameters

Create allows the user to configure another static filtering DB
Save allows the user to save the configuration.
EVC Loopback Management
Select Data -> EVC Loopback Management -> EVC Instance Management as shown in Figure 2-31, EVC Instance Management.
Figure 2-31: EVC Instance Management

Select Data -> EVC Loopback Management -> EVC Filter Instance Management as shown in Figure 2-32, EVC Filter Instance Management.
Figure 2-32: EVC Filter Instance Management

Create allows the user to configure another EVC Loopback Instance.
Save allows the user to save the configuration.
Alcatel-Lucent – Proprietary
Use pursuant to applicable agreements