Procedure 3-6: Change user account

 
1

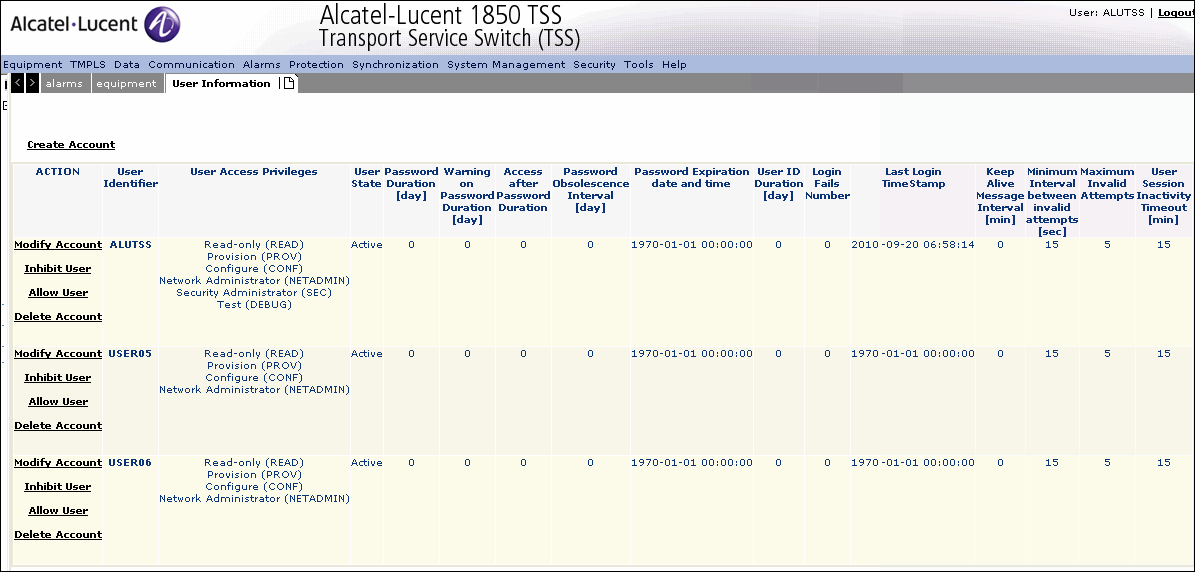
To change a user account, select Security -> Administration -> Accounts->Change Account to display the User Account screen as shown in Figure 3-6, Change user account.

Figure 3-6: Change user account
Change user account+
2

For details on the user account parameters, please refer Table 3-1, Create user account parameters


End of steps

Modify user account parameters
 
1

Navigate to the change user account screen and click Modify Account. The Modify User Account screen is displayed as shown in Figure 3-7, Modify user account.

Figure 3-7: Modify user account
Modify user account+
2

Modify the parameters as described in Table 3-2, Modify user account parameters

Table 3-2: Modify user account parameters

Parameter

Description

User Identifier

Specifies the User name.

New User Identifier

Specifies the new user name.

New Password Identifier

Specifies the new password identifier.

Confirm Password Identifier

Confirms the password identifier

Password Duration [day]

Specifies the duration of applicability of the password in days. The supported value range is 0 to 999. The default value is 0.

Warning on Password Duration [day]

Provides the duration for the applicability of the password in days. The supported value range is 0 to 999. The default value is 0.

Access after Password Duration

Specifies the duration after password duration is complete. The supported value range is 0 to 999. The default value is 0.

Password Obsolescence Interval [day]

Specifies the Password obsolescence interval in seconds. The supported value range is 0 to 999. The default value is 0.

User Id Duration [day]

Specifies the applicability Duration for the User Id in days. The supported value range is 0 to 999. The default value is 60 days.

SNMPv3 Privacy Protocol

Specifies security for private messages.

The supported values are:

  • NOPRIV

  • CBCDES

  • AES

SNMPv3 Authorization Protocol

Specifies security for authentication messages

The supported values are:

  • NOAUTH

  • HMACMD5

Password Expiration date and time

Specifies the date and time of password expiry.

Last Login Time Stamp

Indicates the time stamp for the last login.

Note:Non-editable field.

User State

Indicates whether the state of the User is Active or Inactive.

Note:Non-editable field.

Login Fail Number

Specifies the number of failed login attempts.

Note:Non-editable field.

Keep Alive Message Interval [min]

Indicates the duration in minutes for the message interval.

Note:Non-editable field.

Minimum Interval between invalid attempts [sec]

Indicates the interval span between invalid attempts.

Note:Non-editable field.

Maximum Invalid Attempts

Indicates the number of invalid attempts.

Note:Non-editable field.

User Session Inactivity Timeout [min]

Indicates the user activity timeout duration.

Note:Non-editable field.

Available User Access Privileges

Provides the available user access privileges.

The supported values are:

  • Configure (CONF)

  • Network Administrator (NETADMIN)

  • Provision (PROV)

  • Read-Only (READ)

  • Security Administrator (SEC)

  • Test (DEBUG)

  • No inactivity timeout (NOTMOUT)

User Access Privileges

Specifies the assigned User access privileges. The default value is Read-Only (READ).


3

While modifying User privileges, click to select the user privilege in the Available User Access Privileges field and click png57.pngto assign the user access privilege to the defined user. To remove the permissions for a user, select the mapped User Access Privilege and click png58.png


4

Click Save to save the modifications.


5

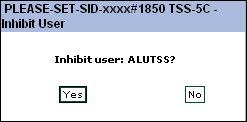
Click Inhibit to restrain the current User account settings, confirm by clicking Yes in the dialog displayed as shown in Figure 3-8, Inhibit user permissions

Figure 3-8: Inhibit user permissions
Inhibit user permissions
6

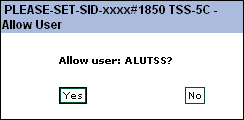
Click Allow to proceed with the assigned User permissions and click Yes in the dialog displayed as shown in Figure 3-9, Allow User permissions

Figure 3-9: Allow User permissions
Allow User permissions
7

Click Cancel to cancel the modifications and return to the previous screen.


8

Click Delete to undo the changes and remove the user account. The account can also be deleted via the User Information settings screen.


End of steps

Modify account default settings
 
1

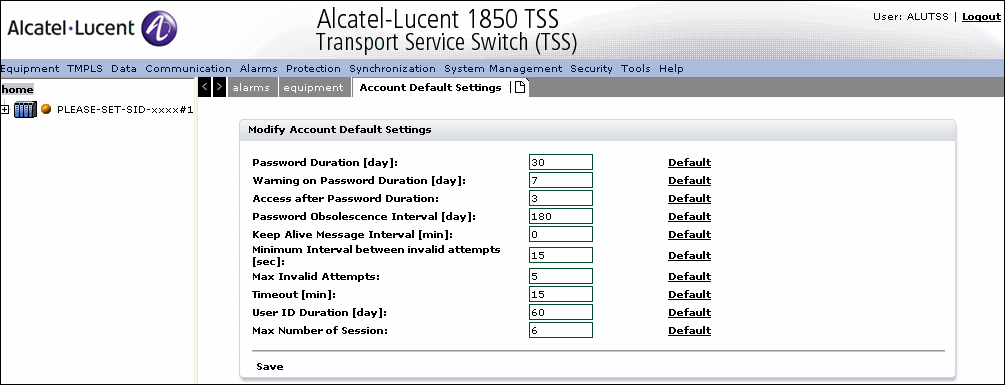
To create a user account, select Security -> Administration -> Accounts->Global Settings to display the Account Default Settings screen as shown in Figure 3-10, Modify Account Default Settings.

Figure 3-10: Modify Account Default Settings
Modify Account Default Settings+
2

Click with each field to modify the account default settings. Click the Default link provided for the field to revert to the system defined default value.


3

Click Save to save the updates to the account default settings.


End of steps

Alcatel-Lucent – Proprietary

Use pursuant to applicable agreements