Procedure 2-4: Upgrade software generic via FTAM
 Overview
Use this procedure to upgrade the software generic to Release 9.1.x via the File Transfer and Access Management (FTAM) protocol.
Note:
You can upgrade directly to 9.1.x from the following releases:
You must complete a two-step upgrade to 9.1.x from the following releases:
You must complete a three-step upgrade to 9.1.x from R5.1.4/5.1.5 through R7.0.2, and then through R8.0.5.
To download the software generic to a local shelf using SFTP, refer to Procedure 2-3: Ugrade software generic via SFTP.
To download the software generic to a local shelf via FTP, refer to Procedure 2-5: Upgrade software generic via FTP.
To download the software generic to a remote shelf via FTTD, refer to Procedure 2-6: Upgrade software generic via FTTD.
Important!
You must have OSI connectivity (via your OSI LAN or DCC) to the network element to use FTAM.
 Privilege level
You must log in as a Privileged user to complete this procedure.
Required equipment
In addition to Required equipment listed in this chapter, the following equipment is also required:
-
CAT5 Ethernet cable with either a 10/100 hub or a cross-over cable for the LAN or IAO LAN port (required for TCP/IP connectivity)
-
Copy of the new system generic software program accessible from your PC.
-
Factory-fresh LNW2, system controller (SYSCTL), with two factory-installed non-volatile memory (NVM) cards installed
-
Current Alcatel-Lucent 1665 Data Multiplexer (DMX) Software Release Description for the software generic being installed
 Before you begin
Before performing this procedure:
-
Refer to Before you begin and Electrostatic discharge in Chapter 1, Safety.
-
Refer to the Alcatel-Lucent 1665 Data Multiplexer (DMX) Software Release Description for a description of any special considerations required when installing this version of software.
-
The SYSCTL must have Alcatel-Lucent 1665 DMX 5.1.3 or later software generic to upgrade the software generic program to 9.1.x via FTAM.
Steps
Complete the following steps to upgrade the software generic via the FTAM protocol.
1 |
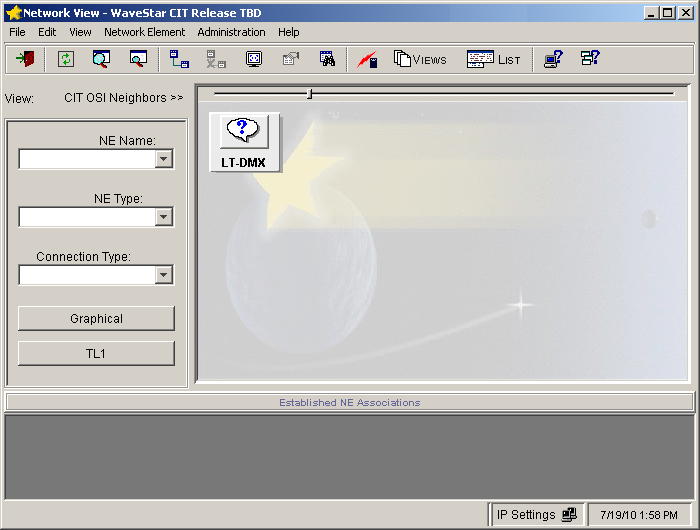
Connect the cross-over LAN cable from the Network Interface Card (NIC) on the PC to the front LAN port on the SYSCTL circuit pack faceplate and establish a WaveStar® CIT session. (When TCP/IP is enabled on the rear LAN port J16 IAO LAN, OSI is disabled.) Double-click the WaveStar® CIT icon on your desktop and login (if necessary), to start the WaveStar® CIT software on the PC. Refer to Procedure 14-2: Connect Personal Computer (PC) and establish WaveStar® CIT session. Result: The Network View appears. | ||||||||||||
2 |
From the View: pull-down menu, select CIT OSI Neighbors. Important! This View: is not the menu bar item View → ...; it is located above the NE Name pull-down menu. Result: The CIT OSI neighbor(s) are automatically detected. If you were previously logged in to the NE and/or you do not see your NE, from the Network View, select View → Refresh OSI View.  | ||||||||||||
3 |
In the Network View, right-click the NE icon that was detected (default TID is LT-DMX, your TID can be different), and select Graphical Using → OSI from the resulting menu. Result: The System Type Selection window appears. | ||||||||||||
4 |
In the System Type Selection window, select DMX and click OK. Result: The NE Login Dialog window appears. | ||||||||||||
5 |
In the NE login window, login to the shelf using your user ID and password. Click OK. | ||||||||||||
6 |
From the System View menu, select View → Equipment, highlight the SYSCTL, and click Select. Result: The View Equipment window appears. Record the Apparatus Code and the Program Version. | ||||||||||||
7 |
What is the apparatus code of your SYSCTL and what program version (software generic Release x.x.x) is it currently running?
End of steps |