Procedure 14-2: Connect personal computer (PC) and establish WaveStar® CIT session
 Required equipment
At least one of the following cables is required:
-
RS-232 cable with an RJ-45 connector on one end and a PC serial connector on the other (typically DB9) for the RS232 port.
-
CAT5 Ethernet straight-through or a cross-over cable for the LAN port. If you are connecting the PC directly to the NE, use the LAN 10Base-T cross-over cable. If you are connecting the PC directly to a hub, use the LAN 10Base-T straight-through cable.
For detailed cabling information, refer to the Alcatel-Lucent 1850 Transport Service Switch (TSS-5) Installation and System Turn-Up Guide.
Important!
You must be a member of either the Administrator Group or the Power User Group on your PC to establish a WaveStar® CIT session.
This procedure assumes that TCP/IP and OSI connectivity has been established to the required network elements in the network.
 Before you begin
Prior to performing this procedure:
-
Refer to Electrostatic discharge in Chapter 1, Safety.
-
If WaveStar® CIT logins were enabled during installation, obtain a valid user ID and password for the WaveStar® CIT.
-
Obtain a valid user ID and password for the required network element.
-
Obtain the Target Identifier (TID)/NE name of the network element that you are establishing a WaveStar® CIT session with.
-
If establishing a WaveStar® CIT session with a network element using TCP/IP protocol, obtain the required IP address of the network element or gateway network element (if applicable).
-
If establishing a WaveStar® CIT session with a network element using OSI protocol, obtain the required NSAP address of the network element (if applicable). Also refer to the CIT OSI Neighbors view and Address List from the WaveStar® CIT Network View.
Steps
Complete the following steps to connect PC and establish a session.
1 |
Connect your PC (using the appropriate cable[s]) to at least one of the following ports:
Important! You can be connected simultaneously to both the RS232 and LAN ports. If you are uncertain that the LAN port has already been provisioned, connecting via the serial port is recommended. |
2 |
Start the WaveStar® CIT software on the PC by double-clicking on the WaveStar® CIT icon on your desktop (created by the installation procedure). Figure 14-1: WaveStar® CIT welcome window
Rxx.xx.xx in the figure represents the WaveStar® CIT release number, for example R22.01.00. |
3 |
Important! If you selected Disable WaveStar CIT logins during the WaveStar® CIT installation, you do not have to log in to the WaveStar® CIT. You will see either the Network Card selection screen (if you have more than one NIC card on your PC) or the WaveStar® CIT legal notice ( Figure 14-3, Legal notice). Enter a valid User ID and password in the WaveStar® CIT Login window and click OK. Figure 14-2: WaveStar® CIT login window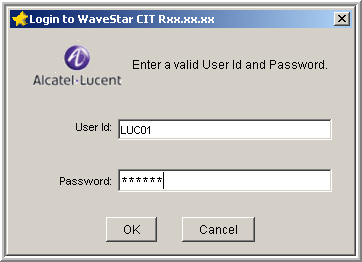
LUC01/LUC+01 and LUC02/LUC+02 are the default user IDs/passwords for the WaveStar® CIT. It is highly recommended that you change these user IDs and passwords during your first session to preserve the security of your equipment. (To change your WaveStar® CIT password, select Administration → Change Password from the WaveStar® CIT Network View.) User IDs must adhere to the following guidelines: Passwords must adhere to the following guidelines:
Important! If this is the first time you are launching the WaveStar® CIT after a new installation or a modification, AND you have more than one Network Card on your PC, you will be asked to select the Network Card you wish to use to connect to the NE. Result: The Legal Notice appears. (Refer to the following figure.) Figure 14-3: Legal notice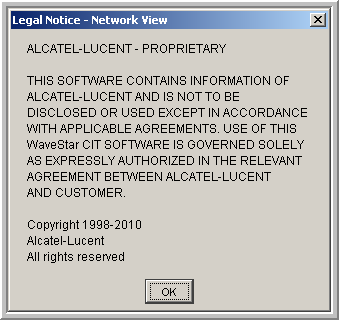 |
4 |
Read the Legal Notice and click OK. Result: The Network View window opens. (Refer to the following figure. If your PC is running a different version of WaveStar® CIT software, there may be some differences between the window shown in the following figure and what is displayed on your PC.) Figure 14-4: Network View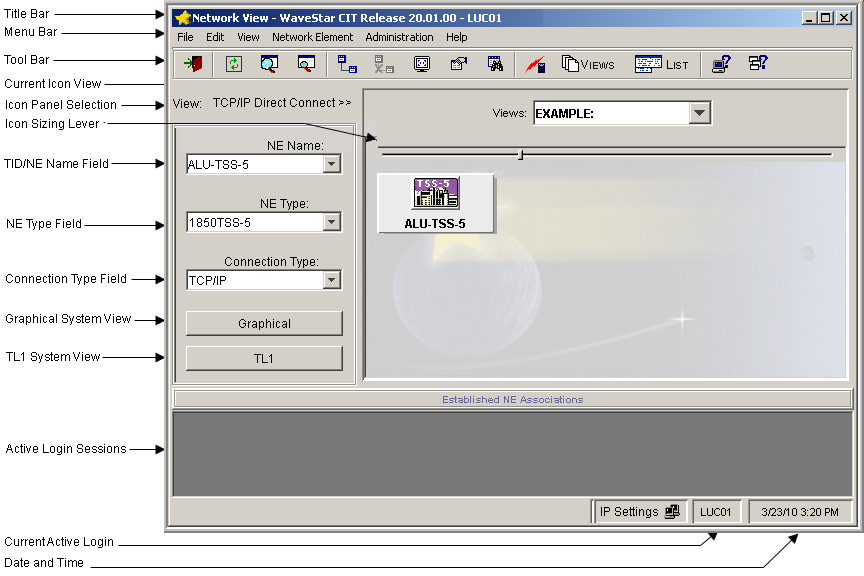 |
5 |
Enter the NE name/TID of the shelf that you wish to communicate with in the NE Name: field. If you have previously established communications with the NE from this WaveStar® CIT, click on the drop-down arrow and select the appropriate NE from the list. |
6 |
In the NE Type: field, click on the drop-down arrow and select 1850TSS-5. |
7 |
In the Connection Type: field, click on the drop-down arrow and select the appropriate connection type.
Important! An IP address must be assigned to the NIC card on the PC; otherwise, login problems may occur. To assign an IP address to the NIC card, start the DOS prompt on the PC and enter the ipconfig/all command. An IP address line should appear. If there is no IP address line or 0.0.0.0 for an IP address, then assign an IP address to the NIC card according to local procedures. |
8 |
After completing the three fields, click on the Graphical button. If you select the TCP/IP option, you must also enter the IP address of your NE and then click OK. Important! All procedures in this manual assume that the Graphical button is used. However, the TL1 button can be selected to communicate directly with the network element using the TL1 Cut Through interface. |
9 |
An NE Login window ( Figure 14-5, NE login) appears: Figure 14-5: NE login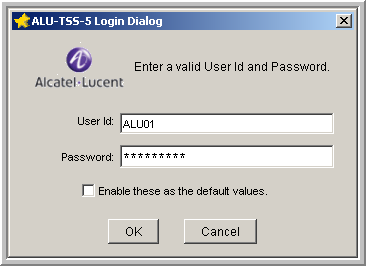
Enter a valid User ID and password to log in to the NE. This example uses the default User ID and Password. Enter the appropriate User ID and Password if the defaults have been changed. By selecting the Enable these as the default values checkbox, you will be able to reconnect to this NE without entering the User ID and Password. However, if you attempt to connect to a different NE that does not have the same User ID and password, the connection will fail and you will be prompted to enter a valid User ID and password. The User ID and Password are stored for the duration of the CIT session and must be re-entered when the CIT is restarted. Important! ALU01, ALU02, and ALU03 are the default privileged user IDs and 1850TSS-5 is the default privileged password for Alcatel-Lucent 1850 TSS-5. It is highly recommended that you change all three user IDs and passwords during your first session to preserve the security of your equipment. (To change your network element password, refer to Procedure 7-2: Change your own password .) |
10 |
If the login is successful, the NE Legal Notice appears. If the login is not successful, try one of the following:
Important! Your NE software Release number and User Privilege Level may be different. Your notice should be similar to Figure 14-6, NE level legal notice. Figure 14-6: NE level legal notice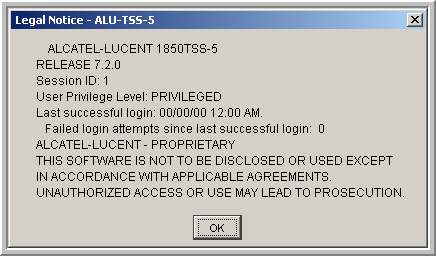 |
11 |
Read and observe the software Release (for example, 7.2.2), and the User Privilege Level (for example, PRIVILEGED). Click OK to continue. Important! The date and time of the last successful login and the number of unsuccessful login attempts are displayed. Result: The WaveStar® CIT System View window opens. |
12 |
Familiarize yourself with the graphical presentation of the shelf, the menu bar, and status indicators. The WaveStar® CIT is designed to MicrosoftWindows® standards. The WaveStar® CIT System View has a menu bar at the top of the window, and status indicators at the bottom of the window. Each item on the menu bar has pull-down menus and submenus. (See Figure 14-7, Example of System View (graphical).) Figure 14-7: Example of System View (graphical)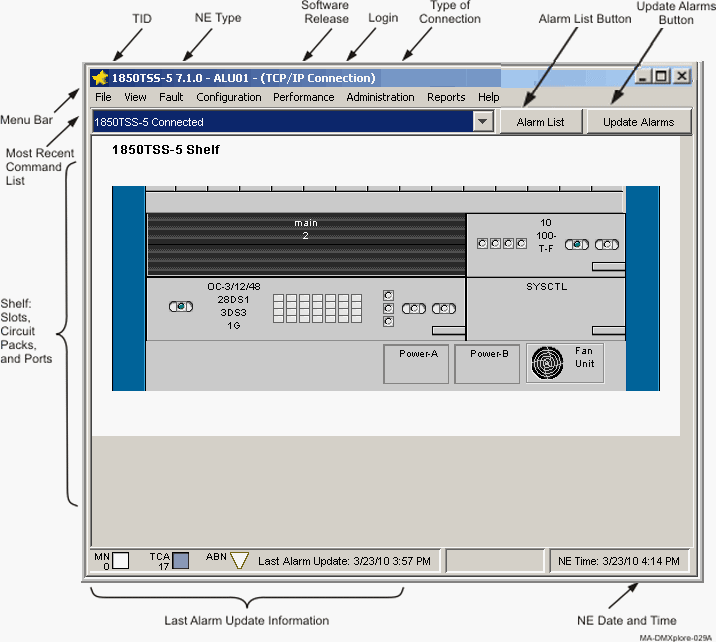 |
13 |
It is recommended that you create a View List for future convenience. From the WaveStar® CIT Network View window (NOT the System View window), select Administration → Administer Views. End of steps |