Custom navigation panels
The EDA navigation menu provides many links to the tools and resources within the EDA GUI, sorted into categories. These categories and links are organized within separate navigation panels (for example, the standard navigation panels Main and System Administration).
To limit the menu links to the links you use most often, EDA allows you to create navigation panels containing only the categories and navigation links that you select. You can even create multiple custom navigation panels, so that you can switch between the panels and their menus that are optimized for particular tasks.
You can also include custom links to internal pages, and links to saved dashboards as part of your navigation panel.
To further help you manage navigation, you can also show or hide any of the standard or custom EDA navigation panels.
Custom Panel page
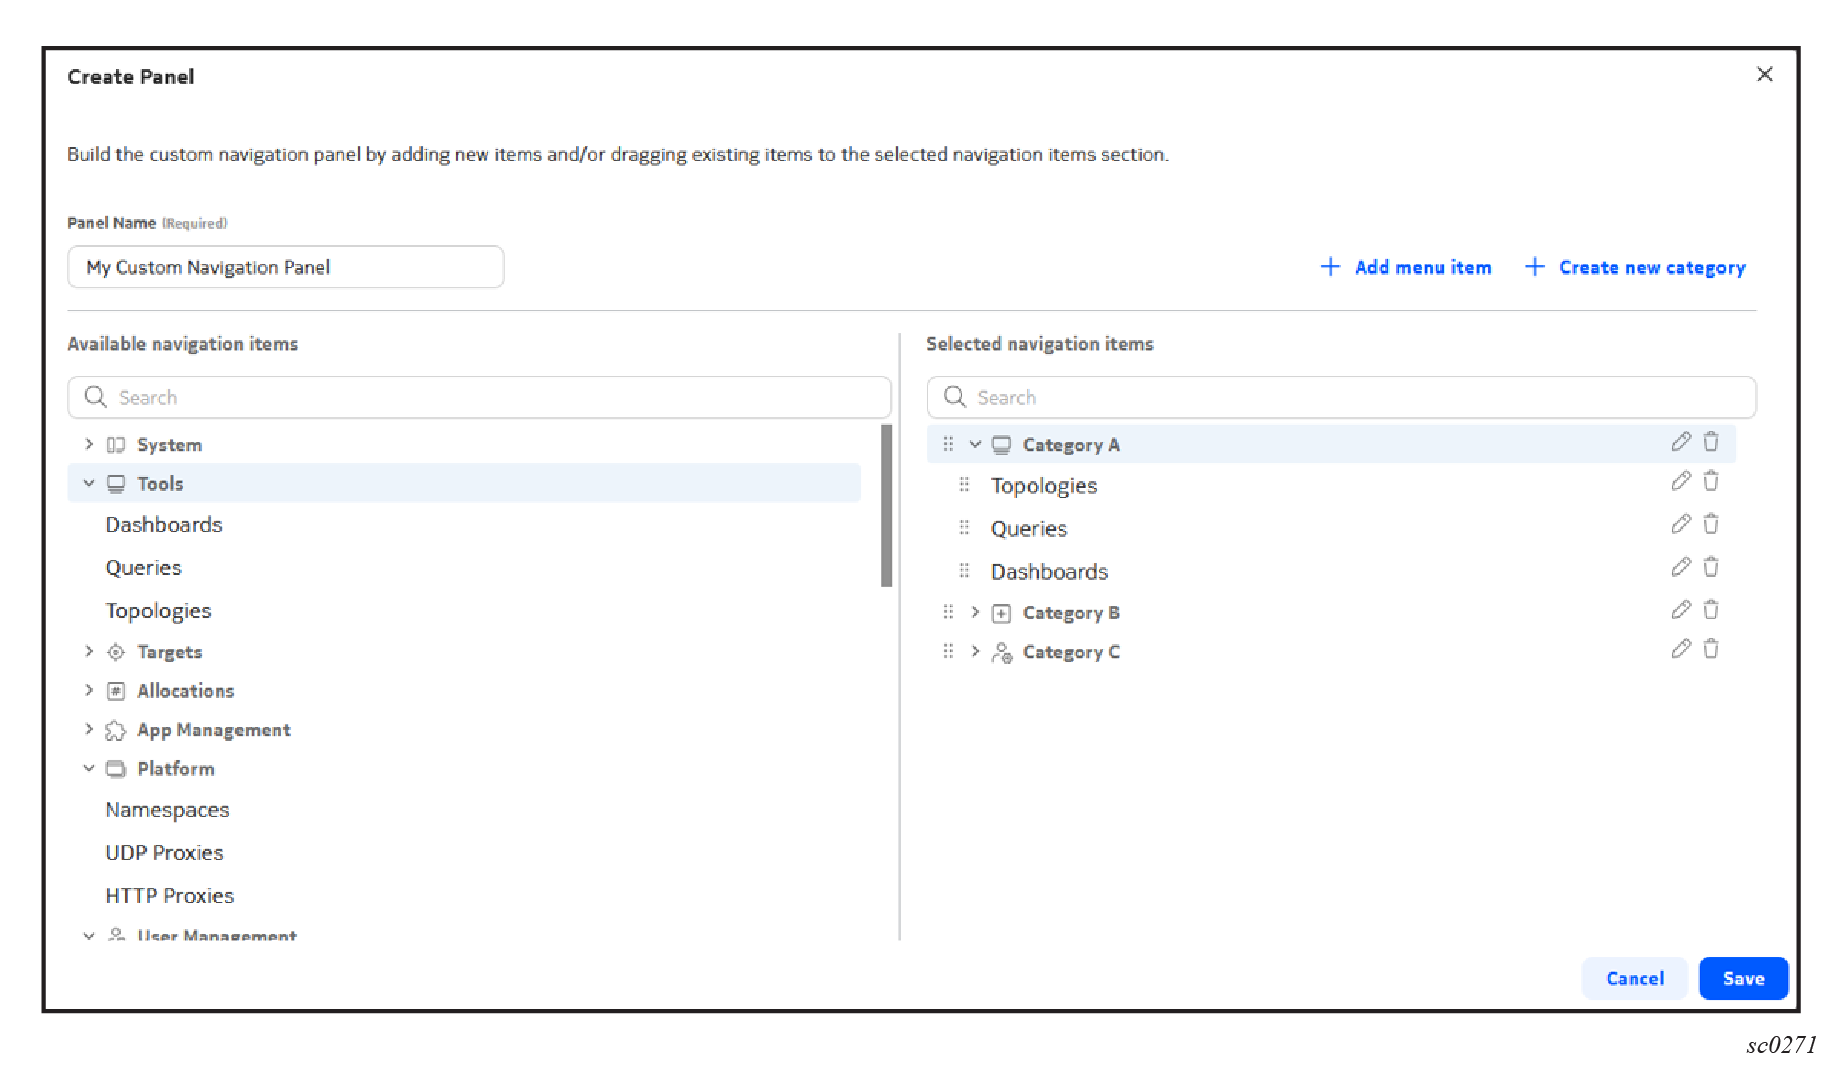
| Item | Description |
|---|---|
| Panel name | Enter the name to be displayed in the EDA navigation menu for this panel. |
| Add menu items link | Opens a form on which to define a custom menu item and add it to an existing category within the navigation panel you are designing. |
| Create new category link | Opens a form on which to define a custom menu category with a name and associated icon, and add it to an existing category within the navigation panel you are designing. |
| Available navigation items | A full list of standard EDA menu categories and their available navigation items. Drag whole categories or individual navigation items to any position within the navigation panel you are designing. |
| Selected navigation items | A preview of the navigation panel you are designing. |
Creating a custom panel
A custom navigation panel is an EDA navigation panel that you construct yourself, containing menu categories and links to pages within the EDA GUI.
After you construct a custom navigation panel, it appears in the list of selectable navigation panels in the EDA main menu. You can then select the custom navigation panel to display it instead of, or in addition to, the standard EDA main menu.
Optionally, instead of constructing the entire navigation panel from scratch, you can duplicate an existing navigation panel and then add and remove categories and menu items as required.
-
Do either of the following:
The Create Panel or Duplicate Panel displays, depending on your selection.
- Enter a name for your panel in the Panel Name field.
- Add one or more categories for your navigation panel.
- Optionally, add one or more custom menu items to your navigation panel and define their target.
- Add one or more standard categories or individual menu items from the EDA main menu to your navigation panel design.
-
To remove a category or menu item from your navigation panel design by click
the trash icon next to that item in the Selected menu
items list.
- To edit a category or menu item in your navigation panel design, do the following:
- Click Save.
Managing custom panels
- In the EDA main menu, select Manage Panels to open the Manage Panels form.
- Find the navigation panel you want to work with in the resulting list.
- Click the vertical dots to the right of the item in the list, and do one of the following: